天Astrophoto collection / Home observatory
この頁では 天文台と ドームの製作過程をご紹介します。
Structure of the observatory and the procces of making dome are shown in this page.


1.概要 Outline of the observatory
(1)ドーム Dome
ベース円中心直径 Diameter of the basic ring: 2727mm
公称 nominal value of the diameter 2.8m
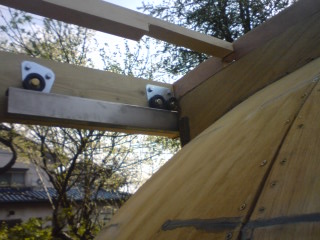
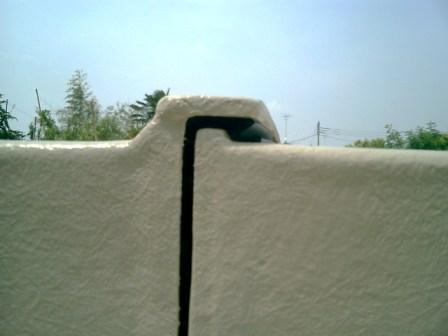
両開きスライド扉式 Double sliding door
扉開口巾 Opening width of the door:1050mm
木造(合板)製、 全外表面:FRPコーティング加工、及び塗装仕上げ
made of laminated wood of 18mm,12mm for the basic structure and 4mm thickness for the skin,
FRP coated and painted for the outer surface .
操作: ドーム回転、扉開閉:いずれも手動式
Operation : all manual
(2)赤道儀設置構造 Mounting structure for the telescope system
鉄筋コンクリート支柱 [90x90cm] 上面にアンカーボルト(3本)で赤道儀支持用の三脚ピラーを固定しています。 鉄筋コンクリート支柱は建物構造とは切り離されています。
Reinforced concrete pillar,90x90cm in section and 2.34m hight,supports equatorial telescope system and basic dimensions are shown below. Any housing structures are free from the pillar.


上図はクリックで拡大されます。
2.ドームの設計,製作 Design and fabrication for the dome
自前・自作です。但し外表面のFRP加工は、専門業者にお願いしました。
All handmade by myself except FRP coating and painting process.
(1)図面 Drawings
基本構造は 誠文堂新光社「天体望遠鏡の作り方−第9章天体ドームを作る」を参考にして、扉のスライド構造、シール構造など少し変えた構造としました。以下の図面は元が A3サイズなので少し欠けています。
Basic idea for the structure is based on the example appeared below mentioed reference.
How to make a telescope/ chapter 9 / making dome
The publisher/ Seibundo-shinkosha
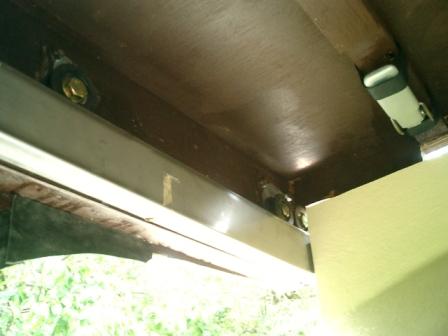
But sliding structure of the double door and cealing mechanism are changed a little with my idea. Some drawings are shown below.
(2)製作 Making process
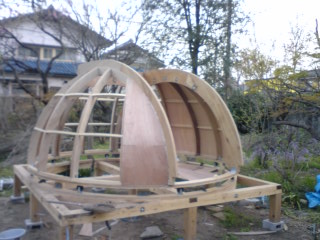
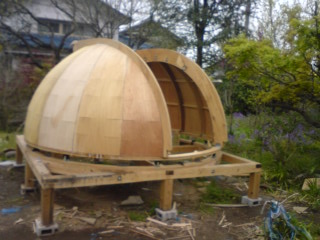
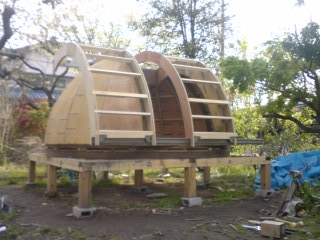
先ずは、土台の製作からです。この土台はドームの平面中心点を持ち、ドーム各部寸法精度が出せるように、また組み立て易くなるようにするためです。ドームを乗せる建物と同じサイズ・構造にして、ドーム円の中心点は写真のように十文字の交点にあります。四隅に「ひうち」という斜め部材を配し、丸いドームを支えられるようにします。角材は105mm角です。
Most of assembliy work was done on the base below to make sure an accuracy of every dimention also for the easiness of the work.

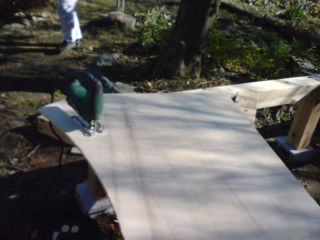
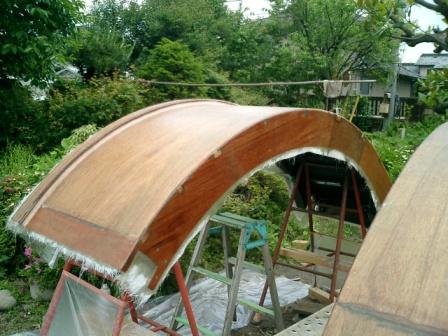
ベースリング(建物側に固定するリング)と、それに対するドーム側のリングも 12t を3枚重ねとし、ドームや扉の骨格は主に18tの合板を2枚張り合わせとしました。
下の写真のように特大棒切れコンパスでひたすらけがき、カットし、張り合わせます。
Big compass, radius can be changed by sliding bars, and cutting, bonding.
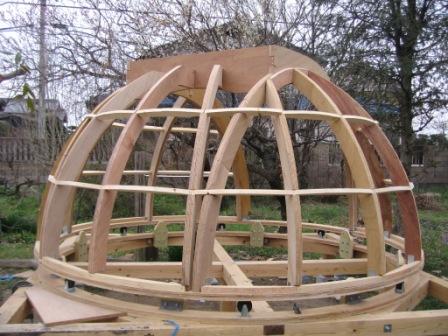
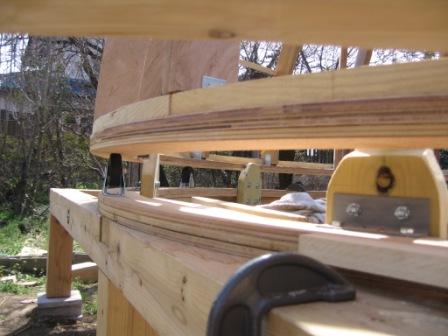
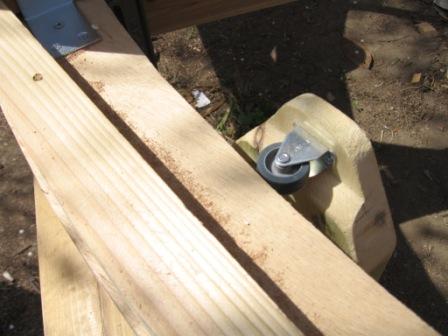
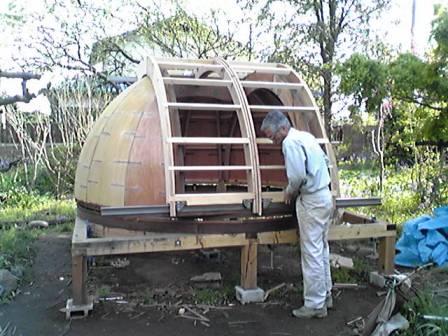
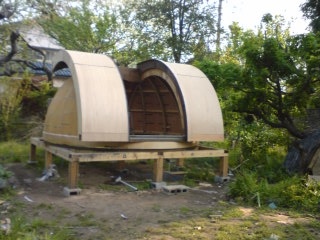
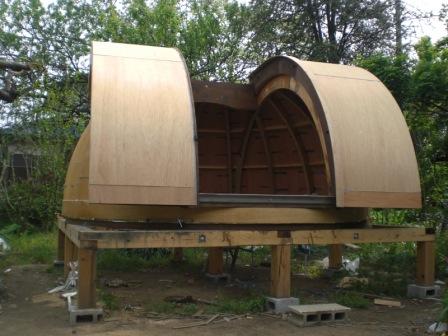
次に土台の上で、組み立て作業にはいります。
Process of assembly work can be seen by clicking below photo and proceeding each scene one by one.
以下の画像をクリックし、コマを進めながらご覧ください。

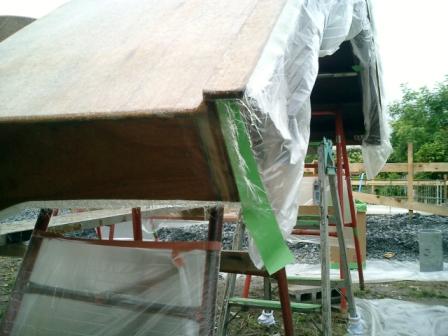
次は業者によるFRP作業です。
FRP coating work by the specialized worker.
そして完成です。\(゚∀゚)/ All finished up


クレーンで吊り上げ、建物とドッキングします。
Crane operation was breathtaking one.

 king
king
興奮のあまりドームを高く吊り上げたシーンを撮り逃しました。


無事に納まりました。Structure of the observatory and the procces of making dome are shown in this page.
1.概要 Outline of the observatory
(1)ドーム Dome
ベース円中心直径 Diameter of the basic ring: 2727mm
公称 nominal value of the diameter 2.8m
両開きスライド扉式 Double sliding door
扉開口巾 Opening width of the door:1050mm
木造(合板)製、 全外表面:FRPコーティング加工、及び塗装仕上げ
made of laminated wood of 18mm,12mm for the basic structure and 4mm thickness for the skin,
FRP coated and painted for the outer surface .
操作: ドーム回転、扉開閉:いずれも手動式
Operation : all manual
(2)赤道儀設置構造 Mounting structure for the telescope system
鉄筋コンクリート支柱 [90x90cm] 上面にアンカーボルト(3本)で赤道儀支持用の三脚ピラーを固定しています。 鉄筋コンクリート支柱は建物構造とは切り離されています。
Reinforced concrete pillar,90x90cm in section and 2.34m hight,supports equatorial telescope system and basic dimensions are shown below. Any housing structures are free from the pillar.

上図はクリックで拡大されます。
2.ドームの設計,製作 Design and fabrication for the dome
自前・自作です。但し外表面のFRP加工は、専門業者にお願いしました。
All handmade by myself except FRP coating and painting process.
(1)図面 Drawings
基本構造は 誠文堂新光社「天体望遠鏡の作り方−第9章天体ドームを作る」を参考にして、扉のスライド構造、シール構造など少し変えた構造としました。以下の図面は元が A3サイズなので少し欠けています。
Basic idea for the structure is based on the example appeared below mentioed reference.
How to make a telescope/ chapter 9 / making dome
The publisher/ Seibundo-shinkosha
But sliding structure of the double door and cealing mechanism are changed a little with my idea. Some drawings are shown below.


(2)製作 Making process
先ずは、土台の製作からです。この土台はドームの平面中心点を持ち、ドーム各部寸法精度が出せるように、また組み立て易くなるようにするためです。ドームを乗せる建物と同じサイズ・構造にして、ドーム円の中心点は写真のように十文字の交点にあります。四隅に「ひうち」という斜め部材を配し、丸いドームを支えられるようにします。角材は105mm角です。
Most of assembliy work was done on the base below to make sure an accuracy of every dimention also for the easiness of the work.
ベースリング(建物側に固定するリング)と、それに対するドーム側のリングも 12t を3枚重ねとし、ドームや扉の骨格は主に18tの合板を2枚張り合わせとしました。
下の写真のように特大棒切れコンパスでひたすらけがき、カットし、張り合わせます。
Big compass, radius can be changed by sliding bars, and cutting, bonding.
 |
 |
 |
次に土台の上で、組み立て作業にはいります。
Process of assembly work can be seen by clicking below photo and proceeding each scene one by one.
以下の画像をクリックし、コマを進めながらご覧ください。


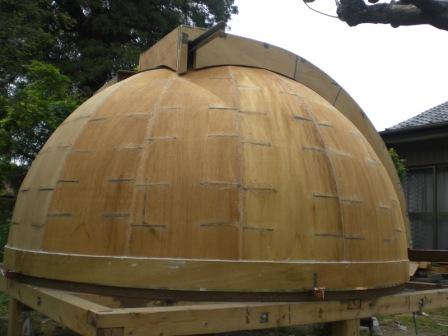

次は業者によるFRP作業です。
FRP coating work by the specialized worker.
 |
 |
 |
 |
 |
 |
そして完成です。\(゚∀゚)/ All finished up
クレーンで吊り上げ、建物とドッキングします。
Crane operation was breathtaking one.
king興奮のあまりドームを高く吊り上げたシーンを撮り逃しました。
Finished safely
